
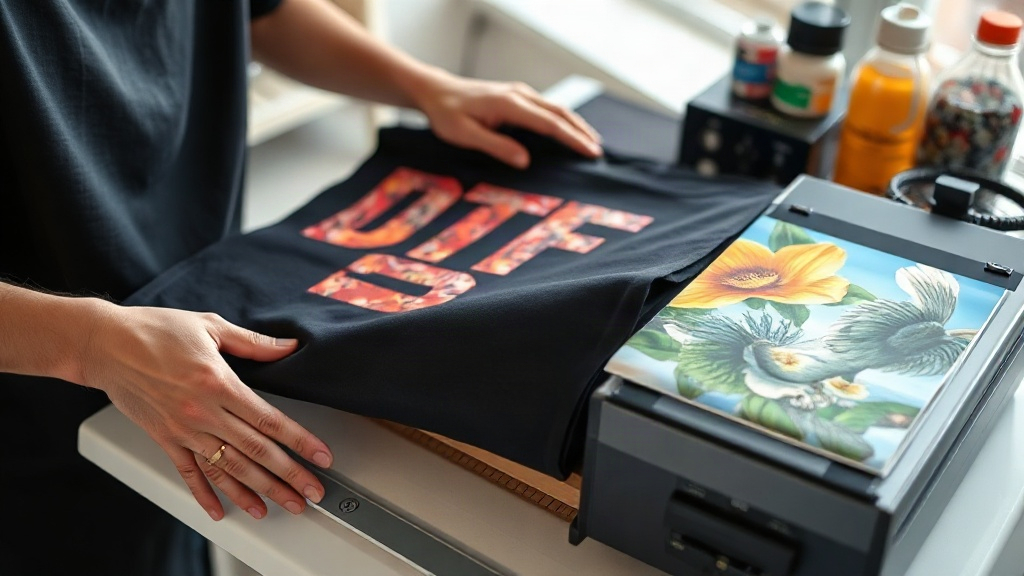
When you first hear about DTF Transfers, you might wonder how they differ from the vinyl or screen-printed shirts you've seen at local shops. The truth is, DTF (Direct to Film) transfers have quietly become a favorite among crafters and small business owners for their versatility and ease of use. Unlike traditional methods that require specific fabrics or expensive equipment, DTF transfers let you print detailed, colorful designs onto almost any material, from cotton to polyester blends, without the hassle of weeding or layering. In this guide, I'll walk you through everything you need to know to get started, sharing insights from my own experience working with DTF transfers in a home studio.
What Are DTF Transfers?
DTF transfers are printed designs on a special film that you apply to fabric using a heat press. The process starts with a digital printer that lays down CMYK inks and white ink onto a PET film. A powdered hot-melt adhesive is then applied to the wet ink, and the film is cured. When you're ready to apply the design, you place it on your garment, press it with heat, and peel away the film. The result is a soft, stretchable print that bonds permanently to the fabric. Because the design is printed on film first, you can create intricate details, gradients, and photographic images that would be difficult with other methods.
Why Choose DTF Transfers Over Other Methods?
There are several reasons why DTF transfers have gained popularity. First, they work on a wide range of fabrics, including cotton, polyester, nylon, and even leather. This makes them ideal for personalizing everything from t-shirts and hoodies to tote bags and caps. Second, DTF transfers don't require weeding or masking, saving you hours of tedious work. Third, the prints are highly durable; they withstand repeated washing without cracking or fading, provided you follow proper care instructions. Finally, DTF transfers are cost-effective for short runs. You can print one-off designs without the setup costs associated with screen printing.
DTF vs. DTG and Vinyl
Direct-to-garment (DTG) printing is another popular method, but it requires pre-treatment and works best on 100% cotton. DTF, on the other hand, adheres to many substrates and doesn't need pre-treatment. Vinyl transfers are great for simple shapes but can't handle complex images. DTF fills the gap, offering high detail on diverse materials.
How to Apply DTF Transfers: Step-by-Step
Applying DTF transfers is straightforward, but attention to detail ensures a professional finish. Here's the process I follow in my studio:
- Prepare your workspace: Set your heat press to the recommended temperature, usually between 300°F and 325°F (150°C to 160°C). Pre-press the garment for a few seconds to remove moisture and wrinkles.
- Position the transfer: Place the DTF transfer on the garment with the printed side facing up. Use heat-resistant tape if needed to keep it in place.
- Press: Apply medium to heavy pressure for 10-15 seconds. The exact time can vary by film type, so check the instructions from your supplier.
- Peel: After pressing, wait a few seconds for the transfer to cool slightly, then peel off the film in a smooth, consistent motion. For a matte finish, you can peel while hot; for glossy, wait until cold. I prefer the cold peel for a softer feel.
- Post-press: For extra durability, cover the design with a Teflon sheet or parchment paper and press again for 5-10 seconds. This ensures the adhesive fully bonds.
Common Mistakes to Avoid
Even experienced crafters can run into issues. Here are a few pitfalls I've learned to avoid:
- Insufficient pressure: Without enough pressure, the transfer won't adhere properly, leading to peeling. Make sure your press is adjusted correctly.
- Wrong temperature: Too hot and the film may scorch; too cold and the adhesive won't activate. Always test with a scrap piece first.
- Peeling too quickly: If you peel before the transfer has cooled (for cold peel), the design can stretch or lift. Patience is key.
- Ignoring fabric type: While DTF works on many fabrics, some like stretchy spandex may require a lower temperature and shorter press time to avoid distortion.
Choosing the Right DTF Transfer Supplies
Not all DTF transfers are created equal. The quality of the film, ink, and powder affects the final result. When sourcing supplies, look for films that are designed for your printer type and offer good ink absorption. The adhesive powder should be fine and evenly applied. I've found that reputable suppliers like DTF Pro Express provide consistent products that yield vibrant colors and strong adhesion. Additionally, consider the transfer size; larger designs may need a commercial-sized press to ensure even pressure.
Printer and Curing Considerations
If you're printing your own DTF transfers, you'll need a printer with white ink capabilities, such as a modified Epson or a dedicated DTF printer. Curing the powder requires a heat source, like a heat gun or a dedicated curing oven. It's a bit of an investment, but it pays off if you plan to produce transfers regularly. For those who prefer convenience, buying pre-printed DTF transfers from a service is a great option, especially for small batches.
DTF Transfers on Different Fabrics
One of the biggest advantages of DTF transfers is their versatility. Here's how they perform on common materials:
- Cotton: Excellent adhesion and vibrant colors. The print feels soft and stretches with the fabric.
- Polyester: Works well, but lower temperatures are recommended to prevent dye migration. Use a lower temperature and test first.
- Blends: Generally good, but the ratio of cotton to polyester can affect the feel. Higher polyester content may require adjustments.
- Nylon: Possible, but requires a special low-temperature adhesive powder to avoid burning.
- Leather: Can be used on leather and faux leather, but use a low temperature and light pressure to avoid damaging the surface.
Durability and Care for DTF Prints
To ensure your DTF prints last, follow these care tips:
- Wait at least 24 hours before washing.
- Turn the garment inside out.
- Machine wash cold with mild detergent.
- Avoid bleach and fabric softeners.
- Tumble dry low or hang dry.
- Iron on the reverse side, never directly on the print.
With proper care, DTF prints can outlast the garment itself, maintaining their color and elasticity.
Frequently Asked Questions
Can I use DTF transfers on dark colors?
Absolutely. DTF transfers include a white ink layer that acts as a base, allowing vibrant colors to show up on dark fabrics. This is a major advantage over DTG, which often requires a white underbase that can feel thick.
How long do DTF transfers last?
When applied correctly and cared for properly, DTF transfers can last for years. They resist cracking, peeling, and fading even after many washes. I've had shirts with DTF prints that still look new after two years of regular wear.
Do I need a special printer for DTF transfers?
If you want to print your own, yes, you need a printer capable of printing white ink, such as a DTF printer or a converted Epson. However, you can also purchase pre-printed transfers from suppliers, which is more cost-effective for occasional use.
What's the difference between hot peel and cold peel DTF transfers?
Hot peel transfers are peeled immediately after pressing while still hot, resulting in a slightly glossier finish. Cold peel transfers are allowed to cool before peeling, giving a softer, matte finish. The choice depends on your preference and the film manufacturer's instructions.
Can I stretch DTF prints?
Yes, DTF prints are stretchable and will move with the fabric without cracking, provided the garment itself is stretchable. This makes them ideal for athletic wear and fitted t-shirts.